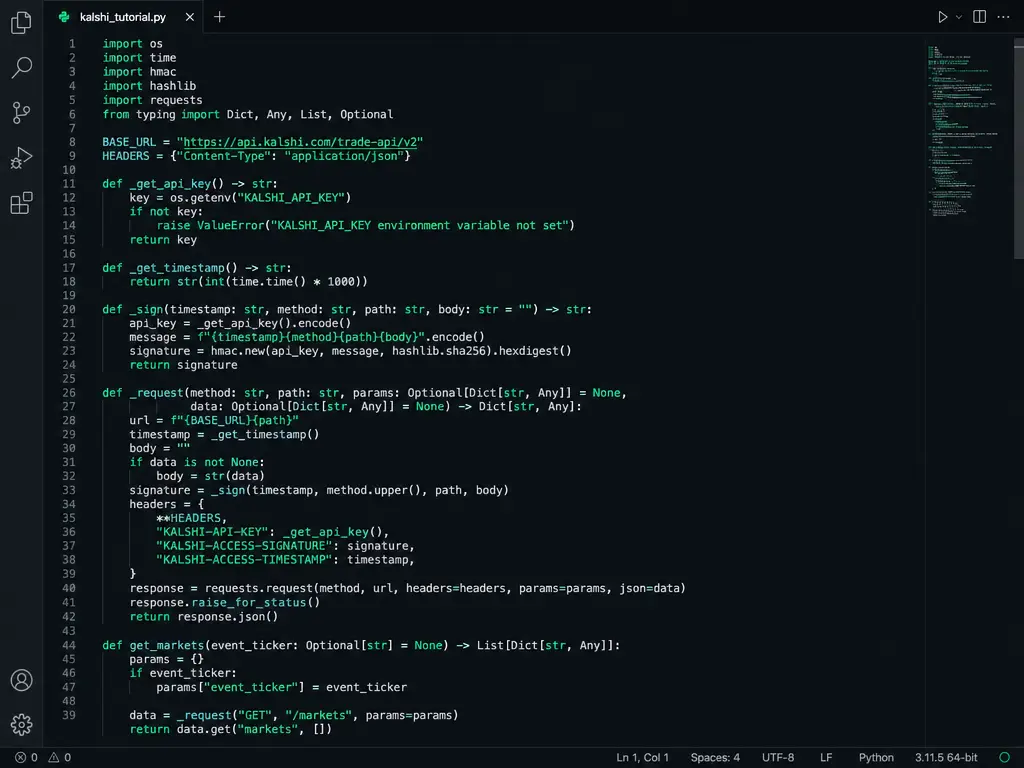
Kalshi API Python Tutorial: Your First Trading Bot in 100 Lines (2026)
Kalshi’s v2 API is the best-kept infrastructure advantage in prediction markets. It is fast, well-documented, and lets you do everything the web app does — pull live market data, place limit orders, track positions, and settle contracts — all from a Python script.
This tutorial walks you through the full process: authentication, fetching markets, placing your first order, and wiring it all into a working bot. No prior API experience required.
What You Will Build
By the end of this guide, you will have a working Python bot that:
- Connects to Kalshi’s API and authenticates with RSA keys
- Fetches live market data for any event
- Places limit orders (Maker = lower fees)
- Checks order status and tracks your position
- Runs on a scheduled loop — hands-free
Prerequisites
Before writing code, get these three things ready:
1. A funded Kalshi account. You need a verified account to generate API keys. Sign up here if you do not have one yet.
2. An RSA key pair. Kalshi uses RSA-signed requests for authentication — no API secrets stored in plaintext. Generate your keys:
openssl genpkey -algorithm RSA -out private_key.pem -pkeyopt rsa_keygen_bits:2048
openssl rsa -pubout -in private_key.pem -out public_key.pem
Keep private_key.pem somewhere secure. Never commit it to Git.
3. Kalshi API key.
Go to your Kalshi API settings and register your public key. Kalshi gives you a key_id — save it. You will need both the key_id and the private key file to authenticate.
Step 1: Authentication
Kalshi’s auth flow uses RSA signing. Every request needs a signed header proving you own the private key matching your registered public key. Here is the complete auth module:
import json
import time
import base64
from cryptography.hazmat.primitives import hashes, serialization
from cryptography.hazmat.primitives.asymmetric import padding
from cryptography.hazmat.backends import default_backend

API_BASE = "https://trading-api.kalshi.com/trade-api/v2"

def load_private_key(path="private_key.pem"):
    with open(path, "rb") as f:
        return serialization.load_pem_private_key(
            f.read(), password=None, backend=default_backend()
        )

def sign_request(method: str, path: str, body: str, private_key) -> dict:
    current_time_ms = int(time.time() * 1000)
    msg_string = f"{current_time_ms}{method}{path}{body}"
    signature = private_key.sign(
        msg_string.encode("utf-8"),
        padding.PSS(
            mgf=padding.MGF1(hashes.SHA256()),
            salt_length=padding.PSS.DIGEST_LENGTH
        ),
        hashes.SHA256()
    )
    return {
        "KALSHI-CLIENT-KEY-ID": "YOUR_KEY_ID",  # Replace with your key_id
        "KALSHI-CLIENT-TIMESTAMP": str(current_time_ms),
        "KALSHI-CLIENT-SIGNATURE": base64.b64encode(signature).decode("utf-8"),
        "Content-Type": "application/json"
    }
Install the dependency:
pip install cryptography requestsExpert insight: Kalshi’s RSA auth is unusual among trading APIs — most use API-key-in-header. This design means your credentials never travel over the wire in plaintext. It is more secure, but the initial setup takes an extra 5 minutes. Worth it.
Step 2: Fetch Live Market Data
Kalshi organizes markets by event ticker and series ticker. Events are things like “Will the Fed raise rates in July?” and series are grouped collections like “Fed Interest Rate Decisions.”
Here is how to pull all active markets:
import requests

def get_markets(headers: dict, status: str = "open", limit: int = 50):
    """Fetch active Kalshi markets with optional filters."""
    path = f"/markets?status={status}&limit={limit}"
    resp = requests.get(f"{API_BASE}{path}", headers=headers)
    resp.raise_for_status()
    return resp.json()

# Usage
private_key = load_private_key()
headers = sign_request("GET", "/markets?status=open&limit=10", "", private_key)
markets = get_markets(headers, limit=10)

for m in markets.get("markets", [])[:5]:
    ticker = m["ticker"]
    title = m["title"]
    yes_bid = m.get("yes_bid", 0)
    yes_ask = m.get("yes_ask", 0)
    print(f"{ticker}: {title}")
    print(f"  YES bid: {yes_bid}¢ | ask: {yes_ask}¢\n")
This gives you the raw data for every active market: bid/ask prices, volume, close time, and settlement rules. You now have everything you need to build a signal.
Step 3: Place Your First Order
Kalshi supports two order types: limit (you set the price, lower fees) and market (instant fill, higher fees). For automated strategies, always use limit orders — the fee savings compound fast.
def place_limit_order(headers: dict, ticker: str, side: str,
                      price: int, count: int, client_order_id: str):
    """Place a limit order on Kalshi.
    side: 'yes' or 'no'
    price: in cents (1-99)
    count: number of contracts (max $1 per contract payout)
    """
    path = f"/portfolio/orders"
    body = json.dumps({
        "ticker": ticker,
        "action": "buy",
        "type": "limit",
        "price": price,       # In cents: 45 = 45¢
        "count": count,       # Contracts to buy
        "side": side,
        "client_order_id": client_order_id
    })
    headers = sign_request("POST", path, body, private_key)
    resp = requests.post(f"{API_BASE}{path}", headers=headers, data=body)
    resp.raise_for_status()
    return resp.json()

# Example: Buy 5 YES contracts on KXBTCD-25JUL at 45¢ each
result = place_limit_order(
    headers, "KXBTCD-25JUL", "yes", 45, 5, "my-order-001"
)
print(f"Order ID: {result['order']['order_id']}")
print(f"Status: {result['order']['status']}")
A few important details:
- Price is in cents (1-99), not dollars. A 45¢ contract =
price: 45. client_order_idis your internal tracking ID. Use it to prevent duplicate orders if your script retries.- Limit orders on Kalshi use Maker pricing — significantly lower fees than Market/Taker orders.
- If your order does not fill, it sits on the book. Check status or cancel it.
Step 4: Check Orders and Track Positions
After placing an order, poll for its status:
def get_order_status(headers: dict, order_id: str):
    path = f"/portfolio/orders/{order_id}"
    new_headers = sign_request("GET", path, "", private_key)
    resp = requests.get(f"{API_BASE}{path}", headers=new_headers)
    return resp.json()

def get_positions(headers: dict):
    path = "/portfolio/positions"
    new_headers = sign_request("GET", path, "", private_key)
    resp = requests.get(f"{API_BASE}{path}", headers=new_headers)
    return resp.json()

# Check if our order filled
status = get_order_status(headers, result["order"]["order_id"])
filled = status["order"].get("filled_count", 0)
remaining = status["order"].get("remaining_count", 0)
print(f"Filled: {filled}, Remaining: {remaining}")
Step 5: Wire It Into a Bot
Now combine everything into a simple loop. This bot checks a single market every 60 seconds and places a limit order when the YES price drops below a threshold:
import time
from datetime import datetime

private_key = load_private_key()
TICKER = "KXBTCD-25JUL"   # Replace with your market
BUY_THRESHOLD = 40         # Buy YES if price drops to 40¢
ORDER_SIZE = 5             # Number of contracts per trade
MAX_POSITION = 25          # Never hold more than 25 contracts

def run_bot():
    while True:
        try:
            # 1. Fetch latest price
            mkt_headers = sign_request("GET", f"/markets/{TICKER}", "", private_key)
            market = requests.get(
                f"{API_BASE}/markets/{TICKER}", headers=mkt_headers
            ).json()["market"]

            yes_bid = market["yes_bid"]
            yes_ask = market["yes_ask"]
            print(f"[{datetime.now().strftime('%H:%M:%S')}] {TICKER}: bid={yes_bid}¢ ask={yes_ask}¢")

            # 2. Check current position
            pos_headers = sign_request("GET", "/portfolio/positions", "", private_key)
            positions = requests.get(
                f"{API_BASE}/portfolio/positions", headers=pos_headers
            ).json().get("positions", [])
            current_position = sum(
                p["position_count"] for p in positions if p["ticker"] == TICKER
            )

            # 3. Trade if conditions are met
            if yes_ask <= BUY_THRESHOLD and current_position < MAX_POSITION:
                print(f"  → Buying {ORDER_SIZE} YES at {yes_ask}¢")
                place_limit_order(
                    headers, TICKER, "yes", yes_ask,
                    ORDER_SIZE, f"bot-{int(time.time())}"
                )

        except Exception as e:
            print(f"Error: {e}")

        time.sleep(60)  # Check every 60 seconds

if __name__ == "__main__":
    print(f"Starting bot for {TICKER}...")
    print(f"Buy threshold: {BUY_THRESHOLD}¢ | Max position: {MAX_POSITION}")
    run_bot()
That is 47 lines of logic. Not a prototype — a working bot.
Rate Limits and Best Practices
Kalshi enforces rate limits, and hitting them mid-trade is expensive. Know the rules:
| Endpoint | Limit |
|---|---|
| GET requests | 100 per second |
| POST/PUT/DELETE (state-changing) | 100 per second |
| Order placement | 100 per second |
In practice, a bot polling one market every 60 seconds will never hit these limits. But if you scale to monitoring 500 markets, add staggered polling and exponential backoff on 429 responses:
def safe_get(url, headers, retries=3):
    for attempt in range(retries):
        resp = requests.get(url, headers=headers)
        if resp.status_code == 429:
            wait = 2 ** attempt  # 2s, 4s, 8s
            print(f"Rate limited. Waiting {wait}s...")
            time.sleep(wait)
            continue
        resp.raise_for_status()
        return resp.json()
    raise Exception("Max retries exceeded")
Other best practices:
- Use unique
client_order_idvalues. Include a timestamp and counter to prevent accidental duplicates. - Paper trade first. Build a version that logs orders instead of placing them. Run it for a week against live data before risking real money.
- Monitor your bot. The simplest approach: send yourself a Telegram or Discord message on every trade. Kalshi does not have native push notifications for API orders.
- Set hard risk limits in code. Max position per market, max daily loss, max concurrent orders — enforce these in your bot, not in your head.
Going Further: Ideas for Your Bot
Once the basic loop works, here is where to take it:
Cross-reference with external data. Pull NOAA weather data for temperature contracts, FRED economic data for CPI/rate markets, or Polymarket prices for arbitrage opportunities. Our five Kalshi trading strategies guide covers these in detail.
Add a database. SQLite is perfect for tracking order history, P&L per strategy, and market price snapshots over time:
import sqlite3
conn = sqlite3.connect("kalshi_bot.db")
conn.execute("""
    CREATE TABLE IF NOT EXISTS trades (
        id INTEGER PRIMARY KEY,
        timestamp TEXT,
        ticker TEXT,
        side TEXT,
        price INTEGER,
        count INTEGER,
        order_id TEXT
    )
""")
Deploy to a server. A $5/month Hetzner VPS or a Raspberry Pi running 24/7 is all you need. Use systemd or a simple cron job to restart the bot if it crashes.
Add LLM-powered signals. Feed market data to Claude or GPT-4o and ask for a probability estimate. Use that as an input to your trading logic — but always validate against hard data.
Common Errors and Fixes
| Error | Cause | Fix |
|---|---|---|
401 Unauthorized |
Wrong key_id or signature | Verify key_id matches registered key; check system clock is synced |
400 Bad Request: invalid price |
Price not in 1-99 range | Remember: 45¢ = price: 45, not 0.45 |
400: duplicate client_order_id |
Reused order ID | Append timestamp: f"bot-{int(time.time())}" |
Insufficient balance |
Not enough funds | Check balance via /portfolio/balance endpoint |
Market closed |
Contract settled or expired | Always check status: "open" before trading |
The Bottom Line
The Kalshi API turns prediction market trading from a manual clicking exercise into a data-driven system. You get the same infrastructure professional trading firms use — low-latency order matching, Maker/Taker fee structure, real-time market data — accessible with Python and 100 lines of code.
Start with the bot above. Paper trade it for a week. Once you trust the execution, add your strategy logic and let it run.
→ Browse the Kalshi Tools Hub → — calculators, cheat sheets, bot kits. Everything you need to trade systematically, organized in one place.
EdgeOutcome may earn a commission if you sign up through our affiliate links. Ready to build? Create your Kalshi account and generate your API key — zero trading fees on all markets. If you are trading on both platforms, check our Polymarket beginner guide for cross-platform strategies. Want the complete bot without writing code from scratch? Grab the Kalshi Bot Kit — 5 strategies, Docker-ready, 19-page PDF guide.